 Milometry
Set Milometry up in five minutes
Choose your rates, add your car, turn on automatic recording and take the first journey. Everything else can wait.
General information, not advice. Written as general information on 27 September 2026. Details change, so check the official source or a qualified professional before you rely on it. This is not legal, tax or financial advice.
You do not have to set everything up before you drive. Milometry works as it is, and this page gets the four things right that make everything afterwards easier. It is the short version: there is a step by step walk through for iPhone and for Android if you want every screen.
1. Go through the welcome screens
The first time you open Milometry, a few orange screens explain what it does. Swipe through them with Next, or tap Skip to jump to the end. On the last one, Turn on reminders asks your phone for permission to send notifications. It is worth allowing: it is how the app tells you a drive has started or been saved by itself.
Tap Set up to carry on.
2. Pick your rates, then your car
Whose rules? comes next. The Country or scheme picker starts on the one that matches your phone's region, so most people just check it and tap Next: your car. If your employer pays a different rate, tap These are not my rates to adjust it, or change it later in Settings → Mileage scheme.
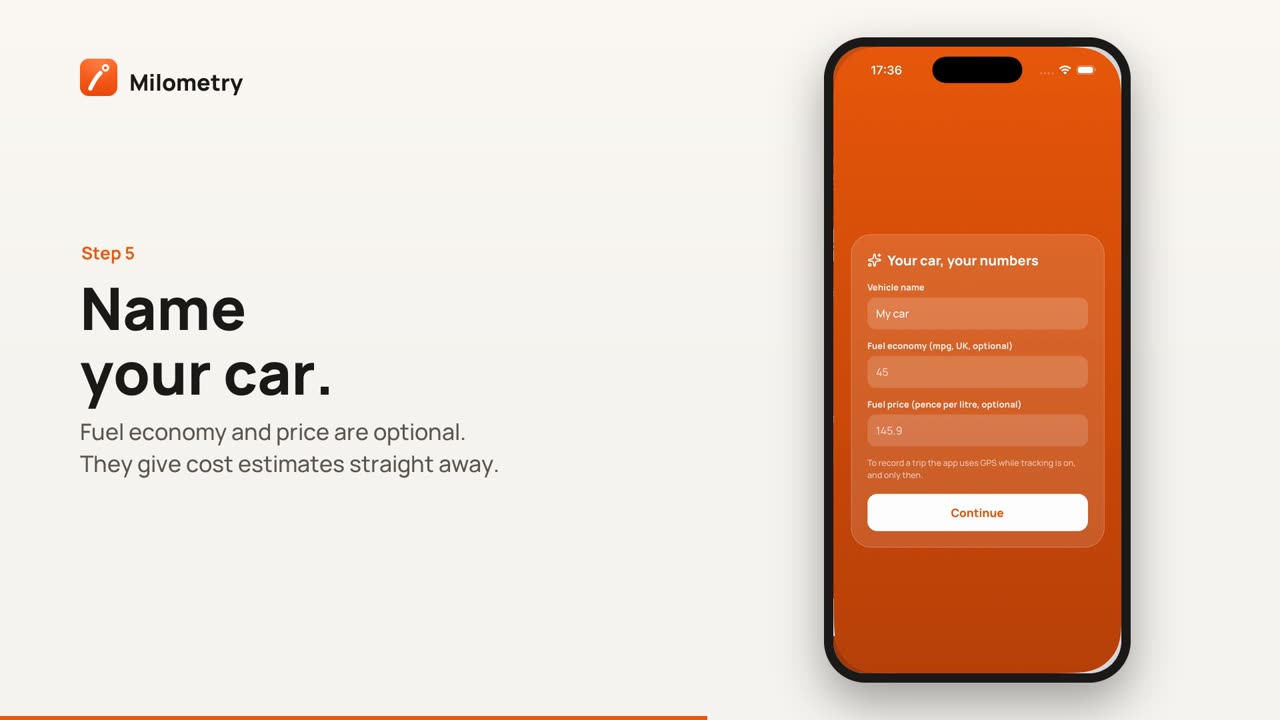
On Your car, your numbers, give the car a name. Fuel economy and fuel price are optional: they give you cost estimates straight away, and once you have logged two full tanks Milometry works out the economy your car actually returns.
Tap Continue. Your phone now asks for location access. Allow it while using the app for now; the next step asks for more.
If you drive more than one vehicle, add the rest later in Settings → Vehicles with the + button.
3. Turn on automatic recording
Once you are in the app, a card called Five things worth doing appears. The first item, Let it record by itself, has a Set up button that opens Settings → Tracking. You can also get there from the Settings tab at any time.
Under Departure detection there are three choices: Off, Ask me afterwards and Auto-record. Tap Auto-record. Your phone then asks for location all the time, which is what lets Milometry notice you driving away while the app is closed. Choosing how it records explains all three options and what each one asks for.
In versions before 1.1.0, Ask me afterwards was called Remind me, and it sent a notification as you set off. It now waits until you have parked.
4. Take a drive
Put the phone away and drive somewhere. There is nothing to tap on the road.
When you get there and have parked, open the app. The Trips tab lists the journey, and the Classify tab is where you sort it into business or personal. A notification may have got there first: Business and Personal buttons on it do the same job from the lock screen.
That is the whole setup. The next thing to learn is sorting trips, which is where the time actually goes.
If something is not right
- A red warning button appears on the map. Tap it. The sheet lists what on your phone is getting in the way, and tapping a line takes you to the setting.
- No drive was recorded. On Android, work through making sure Android records your drives. On iPhone, see iPhone location and background settings.
While you are here
Two optional things that pay off later:
- Settings → Fuel & fill-ups: log a fill-up next time you are on a forecourt. Two full tanks with odometer readings and Milometry knows your real fuel economy.
- Settings → Export & sync: set up a backup to a folder, a cloud drive or your own network drive. Your trips are stored on this phone, so a copy somewhere else is what protects a year of records if the phone is lost.